
To achieve a successful car tinting project, having the right tools is essential. ANZSF provides a range of high-quality tinting tools that enhance precision and efficiency. Key items include the shank for better grip, and the short I-beam handle for gentle squeegeeing, along with a scrubber to clean windows beforehand. A safety film cutter ensures accurate cuts, while tools like the side swipe eliminate air bubbles for a smooth finish. Other important supplies are heat guns for conforming film around curves, utility knives for trimming excess film, measuring tapes for accuracy, and application fluid to aid repositioning. With gloves to prevent smudges and cleaning solutions ready, these essential tools make all the difference in delivering professional-grade results every time.
1. Essential Tinting Tools from ANZSF
When embarking on a car tinting project, having the right tools at hand is crucial for achieving professional results. ANZSF offers a comprehensive range of tinting tools designed to enhance precision and efficiency in film application. For instance, the car tint tools provides a solid grip, allowing for better control when applying the film, while the short I-beam handle is perfect for squeegeeing film into place without risking damage. A scrubber is indispensable for cleaning windows beforehand, ensuring proper adhesion of the tint.
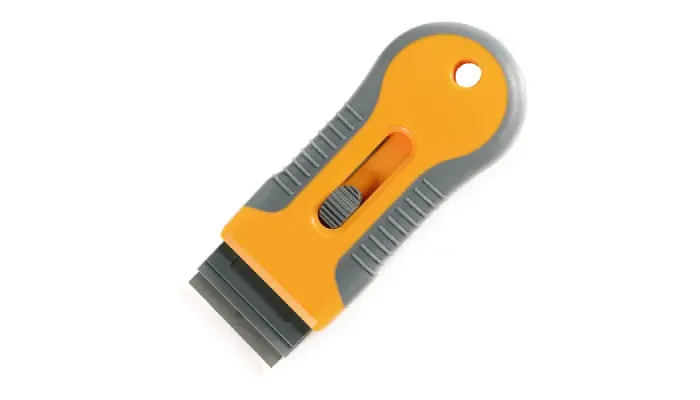
Another critical tool is the safety film cutter, which enables precise cuts without harming the film or window surface. To eliminate air bubbles and ensure a smooth finish, tools like the Side Swipe and the new orange bulldozer are invaluable. They help push out trapped air effectively during installation. Additionally, a razor scraper is essential for removing old film or debris, ensuring a clean surface for the new tint.
For those who prefer the wet application method, the soak tint rope makes repositioning the film much easier. The pro square squeegee blade ensures that even pressure is applied when squeegeeing out air and water, resulting in a flawless finish. Don’t overlook the pink chizler, which is specially designed to reach tight spaces and ensure even film application.
Moreover, the solar power meter helps measure the effectiveness of the tint in blocking solar energy, providing valuable feedback on the quality of the installation. Other essential tools include a heat gun for softening the film, a utility knife for trimming, a measuring tape for accurate sizing, application fluid for easy repositioning, masking tape for protecting edges, gloves to keep the film clean, and high-quality cleaning solutions to prepare the window surface. Each of these tools plays a pivotal role in ensuring that your car tinting project is a success.

2. The Importance of a Heat Gun in Tinting
A heat gun is an essential tool in car tinting projects, playing a crucial role in achieving a professional finish. During the installation process, window films often need to conform to the curves and edges of the glass. This is where a heat gun comes in handy; it softens the film, making it pliable and easier to work with. For instance, when applying tint to a rear windshield with a complex shape, applying gentle heat allows the film to stretch and adhere smoothly without creating unsightly wrinkles or air pockets. Using a heat gun not only enhances the film’s adherence but also ensures that the final result is visually appealing and durable. Proper technique involves holding the heat gun at a safe distance to avoid overheating the film, which can lead to bubbling or distortion. Overall, a heat gun is a vital tool that significantly improves the quality and efficiency of the tinting process.
3. Choosing the Right Squeegee for the Job
Selecting the appropriate squeegee for your car tinting project is essential for achieving a flawless finish. The right squeegee helps push out air bubbles and excess water, ensuring that the film adheres properly to the window. For instance, a pro square squeegee blade provides even pressure, which is crucial for a smooth application. Tools like the new orange bulldozer are specifically designed to tackle stubborn air bubbles that can compromise the look of your tint. When working in tight spaces, a pink chizler can be invaluable for reaching corners and edges without damaging the film. Additionally, combining your squeegee with a safety film cutter allows for precise trimming around the window edges, leading to a clean and professional result. Whether you’re a beginner or a seasoned professional, investing in high-quality squeegees from reputable sources like ANZSF Tinting Tools can significantly enhance your car tinting projects.
- Consider the squeegee’s material (e.g., rubber, hard plastic)
- Look for a comfortable handle for better grip
- Choose the right size for your specific tinting jobs
- Check for flexibility to navigate curved surfaces
- Evaluate the edge design (straight vs. rounded) for different applications
- Ensure it is durable and can withstand repeated use
- Consider specialty squeegees for unique tinting needs
4. Preparing Surfaces with Tack Cloth
Before applying window tint, it’s crucial to ensure that the surface is clean and free of debris. This is where a tack cloth comes into play. A tack cloth is specifically designed to pick up dust and particles from the glass surface, making it an essential step in the preparation process. Using a tack cloth helps to eliminate any contaminants that could interfere with the adhesion of the tint film, leading to a more effective and long-lasting installation. Simply wipe the surface with the tack cloth right before applying the film, ensuring that it’s free from lint, dust, and fingerprints. This small but vital step can significantly enhance the overall quality of your tinting project.
5. Utility Knife: A Must-Have for Precise Cuts
A sharp utility knife is an essential tool for car tinting projects, as it allows for precise cuts that ensure a perfect fit around edges and corners. When trimming excess film, a utility knife helps avoid jagged edges that can detract from the overall appearance of the tint job. For example, when applying tint to the rear windows, the contours can be tricky, and a utility knife enables you to carefully maneuver and cut the film to match the window’s shape. It’s important to keep the blade sharp, as a dull blade can cause tearing and uneven cuts, leading to unsatisfactory results. Additionally, using a utility knife with a safety feature can help prevent accidents during the installation process, making it a practical choice for both beginners and experienced tinting professionals.
6. Measuring Tape for Accurate Film Sizing
A measuring tape is an essential tool for any car tinting project. Accurate measurements are crucial to ensure that the film is cut to the right size before application. When measuring, it’s important to account for the unique dimensions of each window, including any curves or angles. For instance, if you’re working on a car with a sloped rear window, a measuring tape allows you to determine the precise length and width needed, reducing material waste and ensuring a perfect fit. Using a measuring tape not only saves time but also enhances the quality of your work, leading to a professional finish that customers will appreciate. Investing in a reliable measuring tape can make a significant difference in the success of your tinting project.
7. Application Fluid: Making Film Installation Easier
Application fluid is a vital component in car tinting projects. Typically, it’s a mixture of water and a few drops of soap, which creates a slippery surface. This allows the film to be easily repositioned during installation, ensuring a perfect fit on the window. When you spray this fluid on the glass, it helps to prevent the film from sticking immediately, giving you time to adjust its placement before it adheres permanently. For example, if you’re working on a curved window, application fluid enables you to smooth out the film and eliminate wrinkles or bubbles as you go. Without this tool, achieving a flawless installation would be much more challenging, leading to potential issues with adhesion and appearance. Using application fluid can save time and enhance the overall quality of your work.
8. Using Masking Tape for Clean Edges
Masking tape is an essential tool in car tinting that helps achieve clean edges and protects the car’s surfaces during the application process. When applying window film, it’s crucial to ensure that the edges of the film are neat and well-defined. By using masking tape, you can secure the film in place and prevent it from shifting while you work. This is especially important when dealing with larger pieces of film or complex window shapes. For example, you can use masking tape to outline the area where the film will be applied, ensuring that it adheres only to the intended surface. Additionally, it acts as a barrier, protecting the car’s paint and trim from adhesive residue, which can be difficult to remove later. In summary, incorporating masking tape into your tinting toolkit not only enhances the final appearance but also simplifies the installation process, making it a must-have for any successful car tinting project.
9. Protecting Your Hands with Gloves
When working on car tinting projects, protecting your hands is essential. Gloves help prevent fingerprints and smudges on the film, which can ruin the appearance of your work. They also protect your hands from sharp tools like utility knives and safety film cutters. For example, using latex or nitrile gloves can give you a better grip on tools while ensuring your hands stay clean. Moreover, gloves can provide an added layer of safety against any chemicals in the cleaning solutions or application fluids you might use. Investing in a good pair of gloves is a simple yet effective way to maintain the quality of your tinting job.
10. Cleaning Solutions for a Perfect Finish
Cleaning solutions are a crucial element in the car tinting process. Before applying the tint, it’s essential to have a clean surface to ensure proper adhesion. A high-quality glass cleaner will remove any dust, grease, or residues that could compromise the film’s sticking ability. It’s advisable to use a cleaner that evaporates quickly and leaves no streaks, ensuring a crystal-clear view through the tinted windows.
For optimal results, consider using a microfiber cloth along with the cleaner. This combination helps prevent scratches on the glass while effectively removing contaminants. Additionally, a tack cloth can be handy after cleaning; it picks up any remaining dust particles that could interfere with the tint application. By taking these steps, you lay the groundwork for a successful tint installation that looks professional and lasts longer.

Mary Burns is a dedicated writer focusing on health and fitness topics. With a passion for promoting wellness and vitality, Mary shares her knowledge and expertise through engaging and informative blog posts.